How Can We Help?
OpenVPN on TrueNAS
In case you want to remotely manage your TrueNAS server or you want to access your internal home network, you can install OpenVPN on your TrueNAS server.
Prerequisites
For this tutorial, it is assumed that you know how to port forward a port from your modem/firewall to your TrueNAS server. It is also assumed that you have a domain name of which you have a subdomain pointed to the TrueNAS server’s public IP address.
Set up Certificate Authority
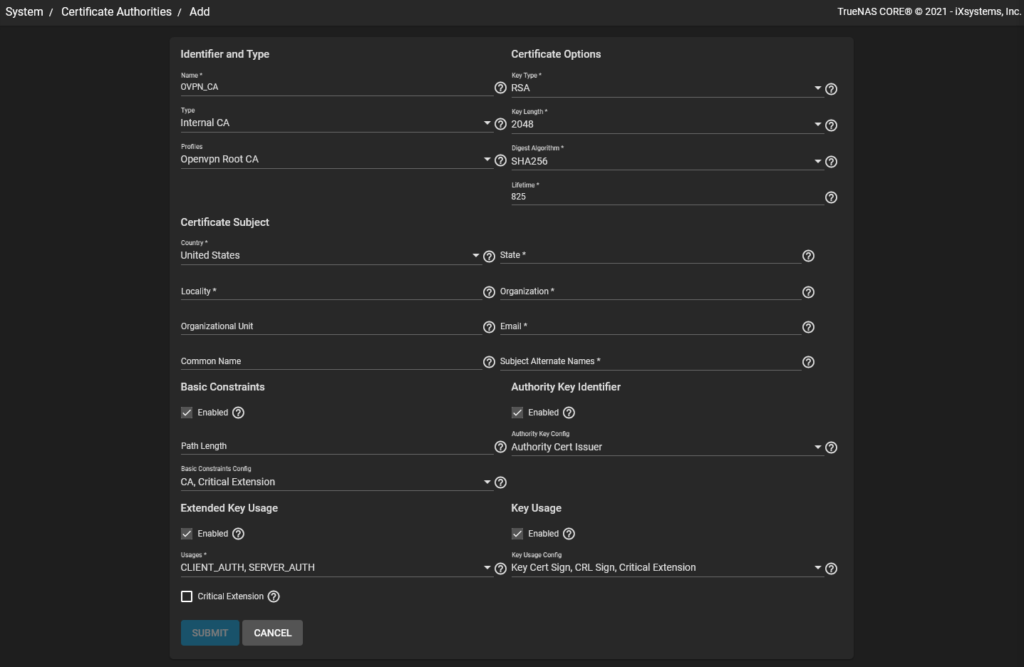
In order to create certificates, you require a Certificate Authority (CA). To create one log in to TrueNAS and navigate to System – CAs. Click Add and give it a name. Choose OpenVPN Root CA as your profile. Make sure to fully fill in the Certificate Subject, for the Subject Alternative Names you have to define which DNS address you are going to access the VPN server.
Set up Server Certificate
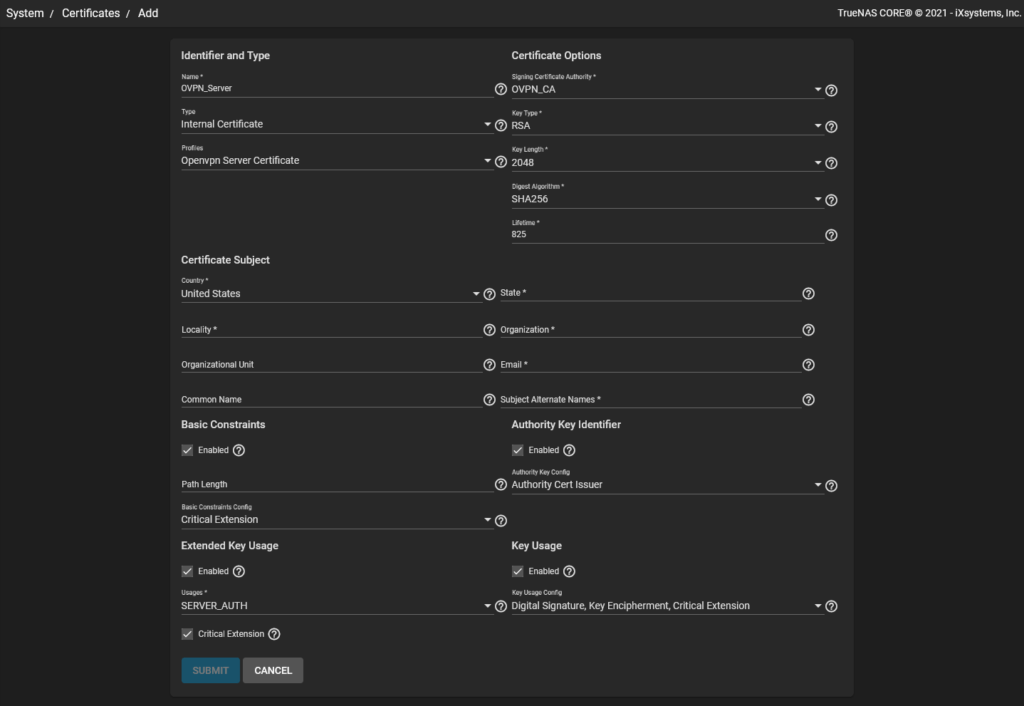
To set up the server certificate go to System – Certificates and click on Add. Give the certificate a name and select OpenVPN Server Certificate as the profile. Make sure to select your previously created CA as the Signing Certificate Authority. Now fill in the same values in the Certificate Subject as you did during the CA process.
Set up a user certificate
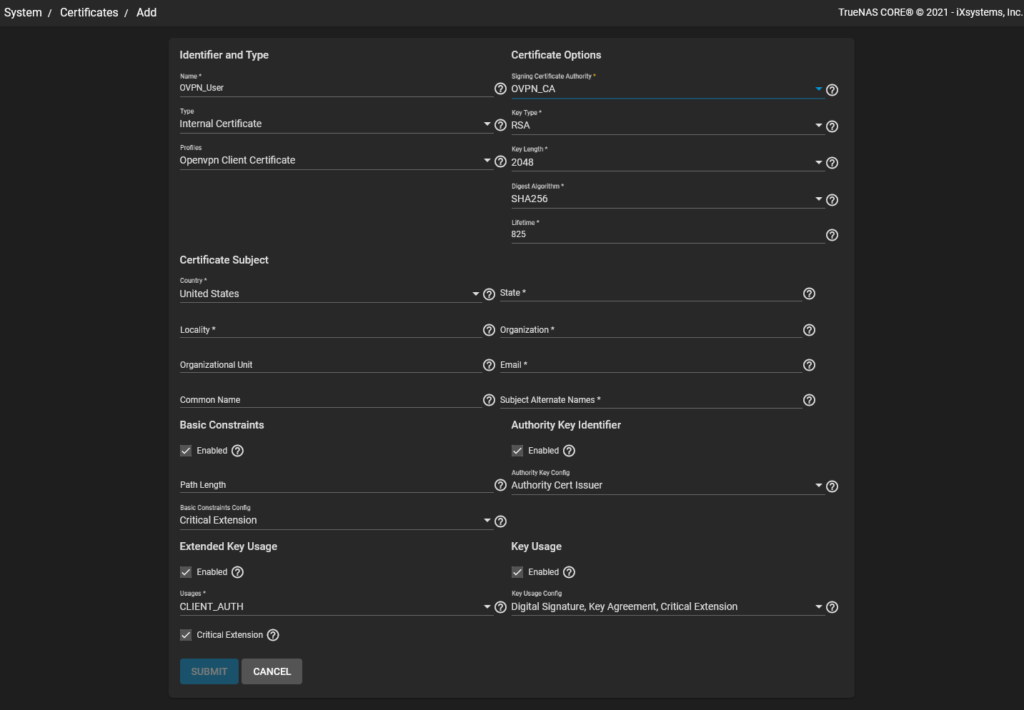
The user certificate is similar to the server certificate. Let’s start by clicking Add on the certificates page. Give the certificate a name and select OpenVPN Client Certificate as the profile. Make sure to select your previously created CA as the Signing Certificate Authority. Now fill in the same values in the Certificate Subject as you did during the CA process.
Set up the OpenVPN service
To set up the OpenVPN service navigate to Services and click on Configure next to OpenVPN Server. For the server, certificate select the certificate you created earlier for the server. The Root CA is the Certificate Authority from earlier. The server requires an IP range. This range is used for the clients that will connect via the VPN. The other settings can be tweaked to your desire or configured as shown below.
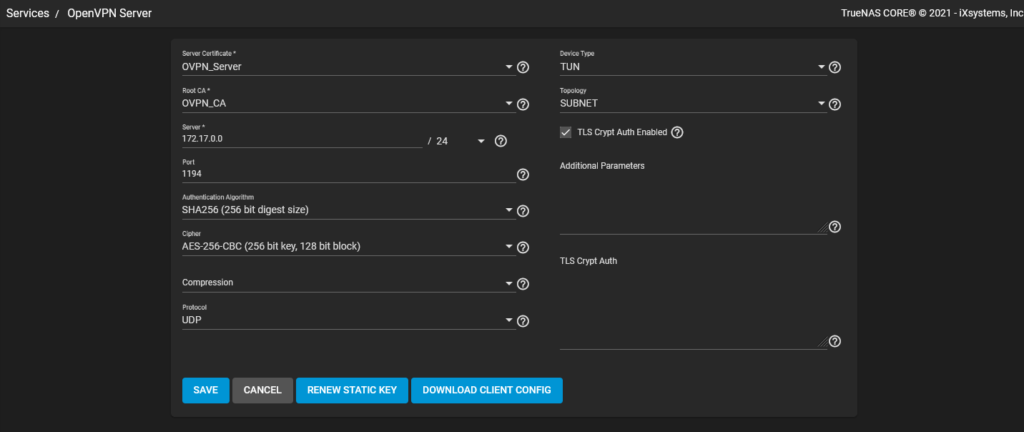
One of the tweaks that are recommended is to add Additional Parameters. By default no other networks than the VPN network are accessible. To add more subnets you can add the line shown below.
push "route 192.168.1.0 255.255.255.0"Now enable the service and click on Start automatically.
Get the client config
To download the client config click on configure again and click Download client config. Once downloaded open the .ovpn file with a text editor. Here you will find the key remote. This key points to the IP address of your TrueNAS server, and modify the value to the domain name you used before when registering the CA and certificates.
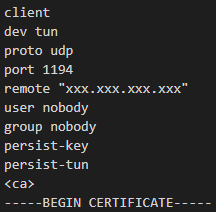
Once you modified the config, you have to make sure that the domain name is set to the public IP of your TrueNAS server. Also, make sure that the correct port and protocol are forwarded to the TrueNAS server. Copy the config to a device of your choice and connect it to the public internet (not your internal home network), and test your connection using the OpenVPN client.
FAQ
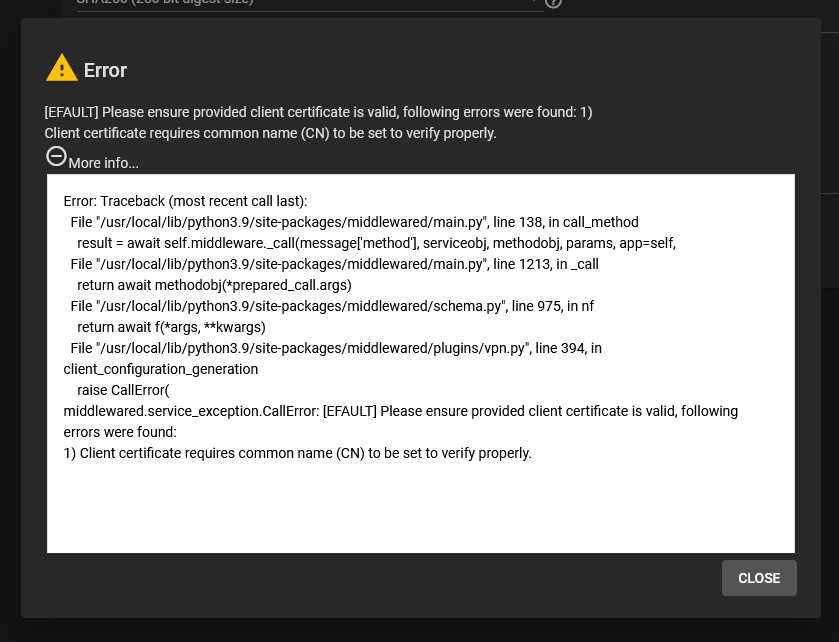
In case you get an error when downloading the client config make sure that the client certificate has a Common Name.
3 Responses
I constantly enjoy reading your posts. Thanks for sharing your insights and ideas with your readers.
Your prose paints colorful scenes in my mind. I can clearly visualize every aspect you describe.
Your passion is contagious; I’m encouraged to take action now.