How Can We Help?
Nextcloud on TrueNAS
Do you want to share the files on your NAS in a safe way? Nextcloud is here to save your day! It allows you to securely share the files you define via an easy-to-use interface. Besides only filesharing Nextcloud has grown to be a complete content collaboration platform.
Prepare storage location
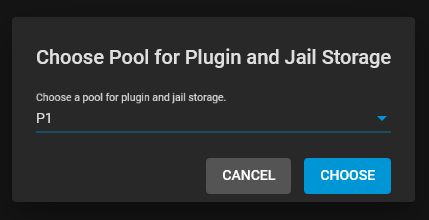
TrueNAS uses so-called jails. These jails are small environments in which a certain service runs isolated. The data of these jails has to be stored in a storage pool. To set this up navigate to Jails. If this is the first time you open this section, TrueNAS will prompt you where to store the data. Select your desired dataset
Install Nextcloud jail
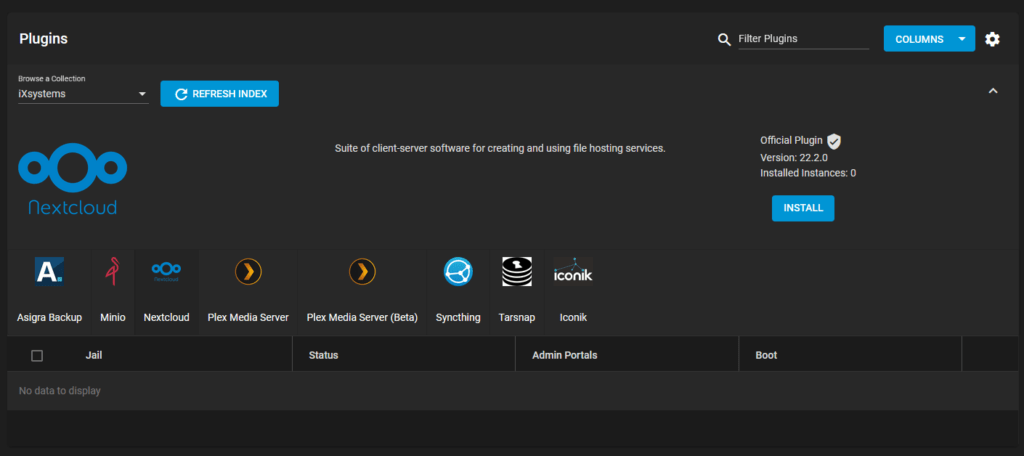
In the TrueNAS web interface navigate to plugins. Here you will find the plugins officially supported by iXsystems, but also the community plugins. Make sure the collection is set to iXsystems. In the collection locate Nextcloud and click install.
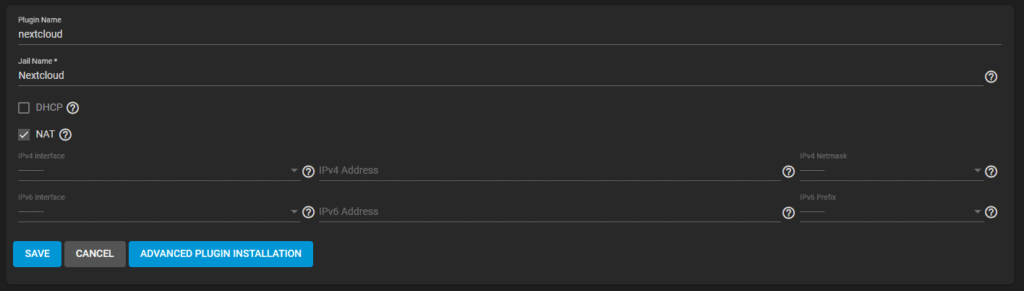
This will open a configuration window in which you have to configure the jail. Fill in a name and decide between DHCP and NAT. In case you use DHCP it will get a new IP address from your modem, if NAT is chosen it will use the same IP as TrueNAS and run it on a specific port. If you are satisfied click Save.
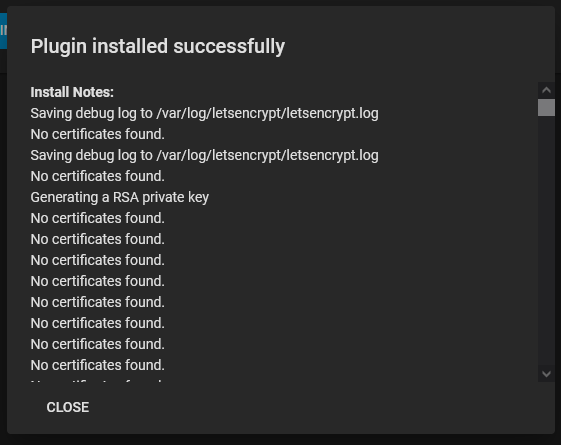
This process might take a while. After it is finished it will tell you if it is installed successfully, to find the IP address scroll down in the completion window.
The installation has already created an account for you. Expand the jail and click on post-install notes. This will reveal your username and password. Now you can navigate to the aforementioned URL and login to your Nextcloud.
Add a dataset to Nextcloud
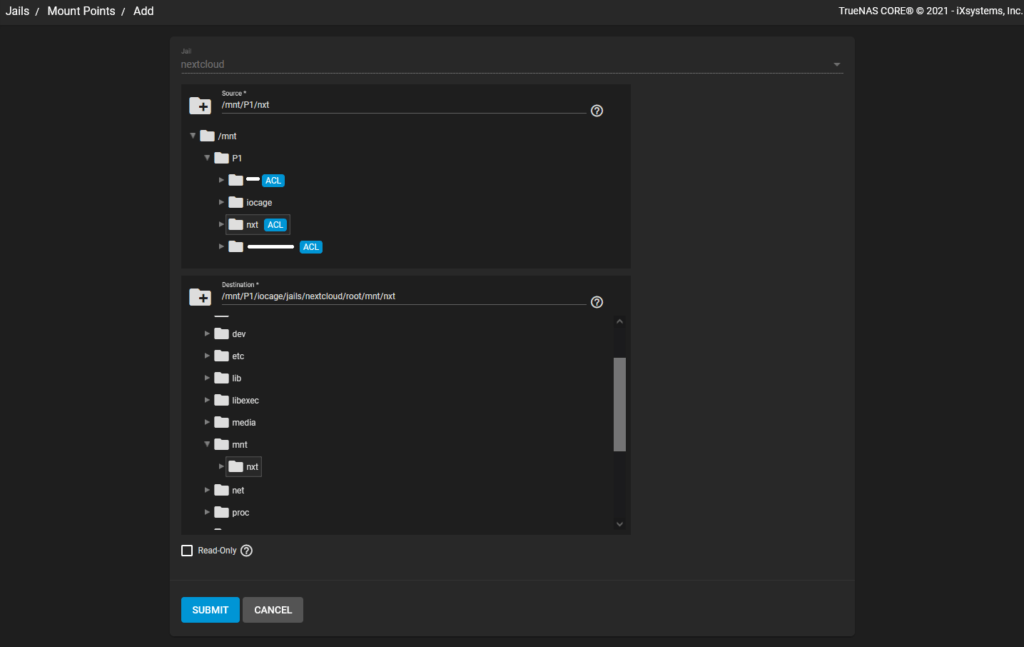
To add a dataset to Nextcloud navigate to plugins, select your Nextcloud jail and click Stop. Now select Mount points. Here you can select the dataset you want to add to Nextcloud. For the mount point, I recommend using mnt/<name_of_your_dataset>. Once your selection is made click Submit.
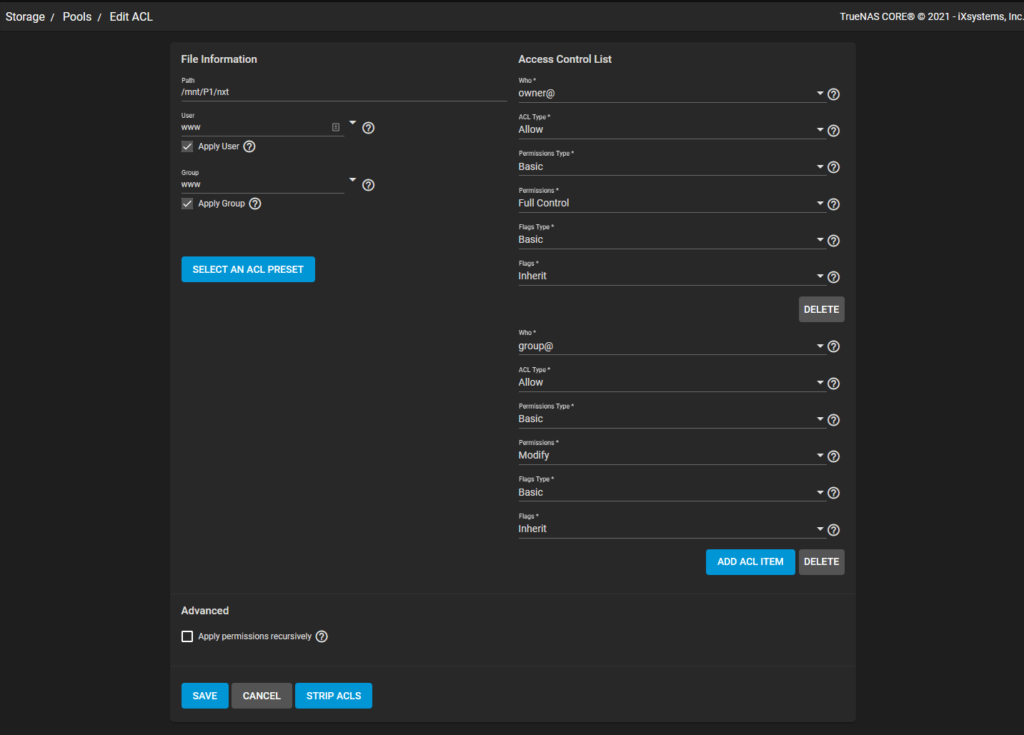
Before we can start our jail again we have to fix the permissions for the dataset. Nextcloud will run under the www user and group. Therefore, navigate to your dataset and click Edit permissions. For both the user and group select www. Also make sure to select Apply user and Apply group, and click Save.
No go back to your Nextcloud jail and start it again. Once it is started login to Nextcloud and navigate to Apps. Locate the External storage support app and click enable. Now navigate to Settings and select External Storage under Administration. For External storage choose Local, choose a name, and add the mount point to the Configuration. Additionally, you can specify which users/groups have access to this storage location. Once you are satisfied click the checkmark.

4 Responses
I appreciate how you simplify complex concepts into easily digestible segments. Kudos!
I’m definitely going to share this write-up with my friends and followers.
I value the dedication you put into digging deep into and offering evidence for your arguments. It adds validity to your concepts.
Great post, I really enjoyed reading it. Your way of writing is very engaging and the ideas are highly relevant. Thank you for sharing!