How Can We Help?
Joining a non-ZFS cluster as a ZFS configured Proxmox server
Did you create a Proxmox cluster without ZFS, and do you want to add a Proxmox server that is configured with ZFS? Then you might run into some issues where the storage does not show as expected. This article shows you how you have to configure the cluster to properly show the storage.
Prerequisites
In this case, it is assumed that you have already set up a cluster. If this is not the case, have a look at the article about clusters (wiki.mphslaats.com).
Joining the cluster
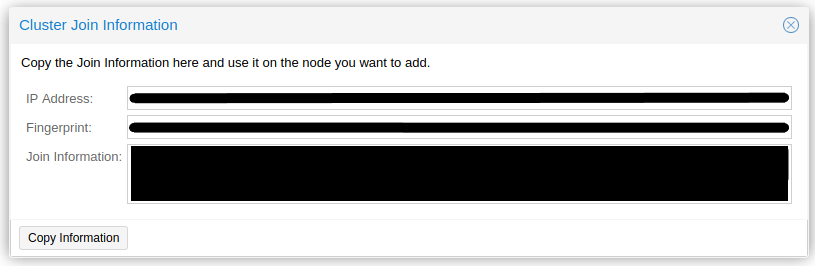
To join a cluster you first have to log in to the Proxmox server on which you have created the cluster. Go to Datacenter – Cluster, and click on the Join Information button. This opens a window with information about the cluster. Click on Copy Information.
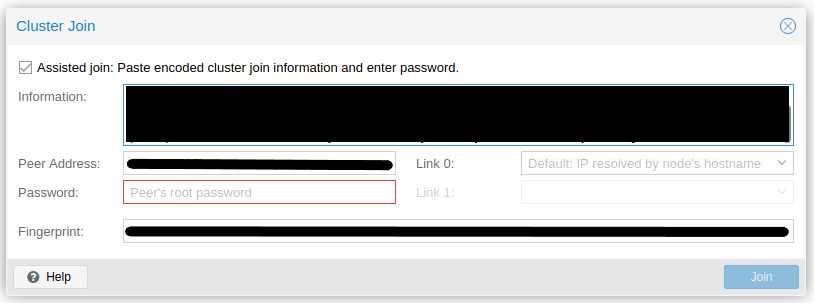
Now, login to the Proxmox server that you want to add to the cluster. Navigate to Datacenter – Cluster, and click on Join Cluster. Because the information to join is copied to your clipboard, you can enter Ctrl-C in the Information field. Proxmox will help you out and fill in the rest of the information. To be able to join the cluster you only have to provide the password.
Proxmox will now try to communicate with the cluster and add itself. After it has added itself to the cluster you have to refresh the page, since Proxmox changed the HTTPS certificate. If it takes too long to join you can check if the server has been added to the Proxmox server on which you created the cluster.
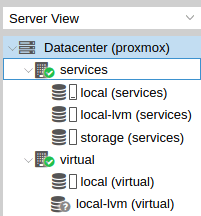
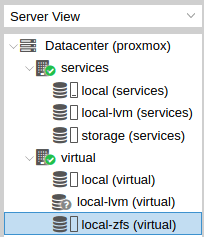
If you look in the Server View on the left, you will see something similar to the image below. The server that contains the ZFS configuration (virtual) shows a question mark for the local-lvm storage.
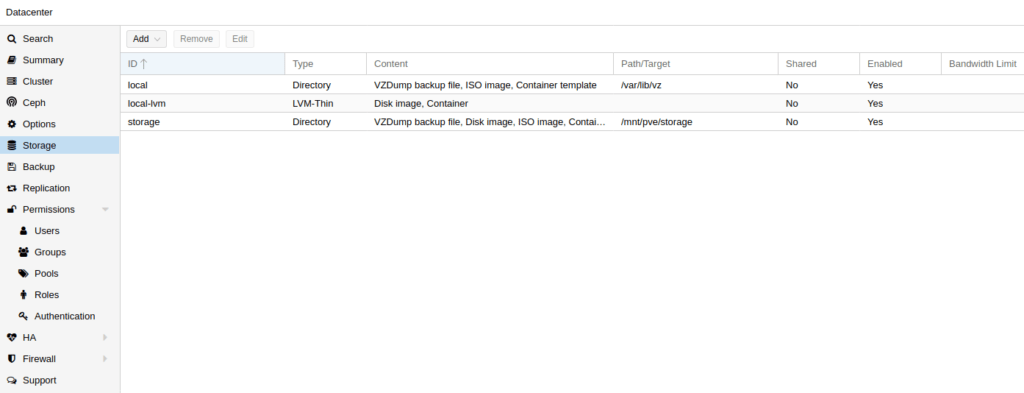
To fix this go to the Datacenter – Storage. This will show you a list of the configured storage.
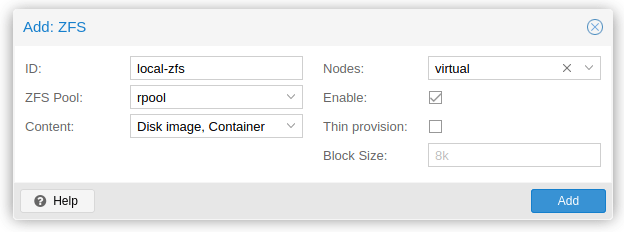
To make sure that the ZFS storage is visible in your ZFS click the Add button. Select ZFS from the list, this will open a new window. Type local-zfs in the ID field. Select rpool from the ZFS Pool list. Click the Nodes option and select the Proxmox server which has the ZFS configuration.
In the Server View of Proxmox, you will now see a new storage item for your ZFS-configured server.
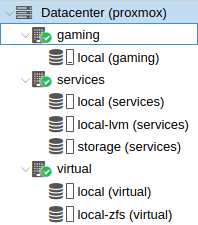
Take note that the local-lvm option is still not known for the ZFS-configured system. To fix this you can select the local-lvm item from the storage list, and click Edit. Select all the non-ZFS configured systems in the Nodes field, and click OK.

Now the local-lvm storage has disappeared from your ZFS-configured Proxmox server. Take note that you have to configure the storage if you add a new Proxmox server to the cluster since you limited local-lvm and local-zfs for their appropriate servers. Adding a new server to the Proxmox cluster will look like the image below, in this case, the gaming server has been added.
19 Responses
This blog offers high-quality details on related topics. Keep up the fantastic work.
Your blog has swiftly become my preferred source for inspiration. I thank you for sharing your thoughts.
I’m impressed by your aptitude to turn ordinary topics into engrossing writing. Well done!
Your blog is consistently packed of valuable information on a variety of topics. Thanks for all that you do.
Great web site you have got here.. It’s hard to find quality writing like yours these days.
I seriously appreciate individuals like you! Take care!!
Your blog is an amazing source of knowledge on related topics. Thank you for offering your knowledge with the world.
I value the dedication you put into researching and providing evidence for your points. It adds validity to your ideas.
Nice post. I used to be checking continuously this blog and I’m inspired!
Extremely helpful information specially the remaining section :
) I maintain such info much. I was seeking this particular info
for a very long time. Thanks and best of luck.
I find your voice real and relatable; it resonates strongly with me.
Your posts consistently offer beneficial insights; you are a reliable source of knowledge.
Excellent post. I was checking continuously
this weblog and I’m impressed! Very useful information particularly the last section 🙂 I handle such info much.
I was looking for this certain info for a very lengthy time.
Thank you and best of luck.
You’ve addressed all the potential issues someone might have about this topic.
I’ve added your site to my favorites; keep up the great content!
Have you ever considered about including a little
bit more than just your articles? I mean, what you say is fundamental and everything.
Nevertheless think about if you added some great graphics or video clips to give your posts more, “pop”!
Your content is excellent but with images and video clips, this site could
definitely be one of the greatest in its field.
Amazing blog!
Your writing style eloquently reflects your authentic self, making readers feel engaged and understood.
Your knowledge shines through in this piece; I’m awe-inspired.
Howdy exceptional blog! Does running a blog like this take a
large amount of work? I’ve absolutely no expertise
in programming but I had been hoping to start my own blog soon.
Anyways, if you have any suggestions or tips for new blog owners please share.
I know this is off subject nevertheless I just needed to ask.
Thanks a lot!
I appreciate the dedication you put into presenting all the necessary details.
Your passion resonates powerfully in every word you compose. It’s truly commendable.