How Can We Help?
Ubiquiti Guest WiFi with Captive Portal
Do you always use the same password for everything, including your WiFi? Do you not want to give that very passwords to people who come over and beg for the internet? Do you happen to have a Ubiquiti access point, and do you want to show off to those same people? Say no more, this article shows you how you can easily set up guest WiFi with a captive portal.
Setup guest WiFi with portal
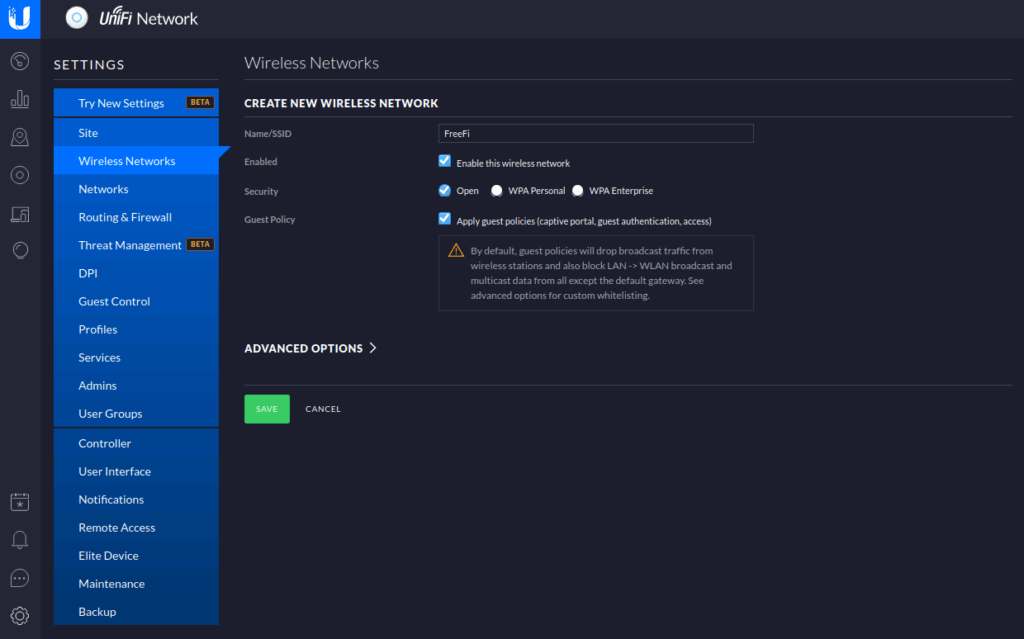
To set up guest WiFi, it is assumed that you already have a Ubiquiti Cloud Key setup, with an adopted Ubiquiti access point. So, log in to your Cloud Key and navigate to Settings (bottom left) – Wireless Networks. Click on Create new wireless network. Give this network a name and make sure it is enabled. Make sure that Security is set to Open, and the Guest Policy is applied.
If you don’t want a login portal, you can change the security to WPA, and enter a password.
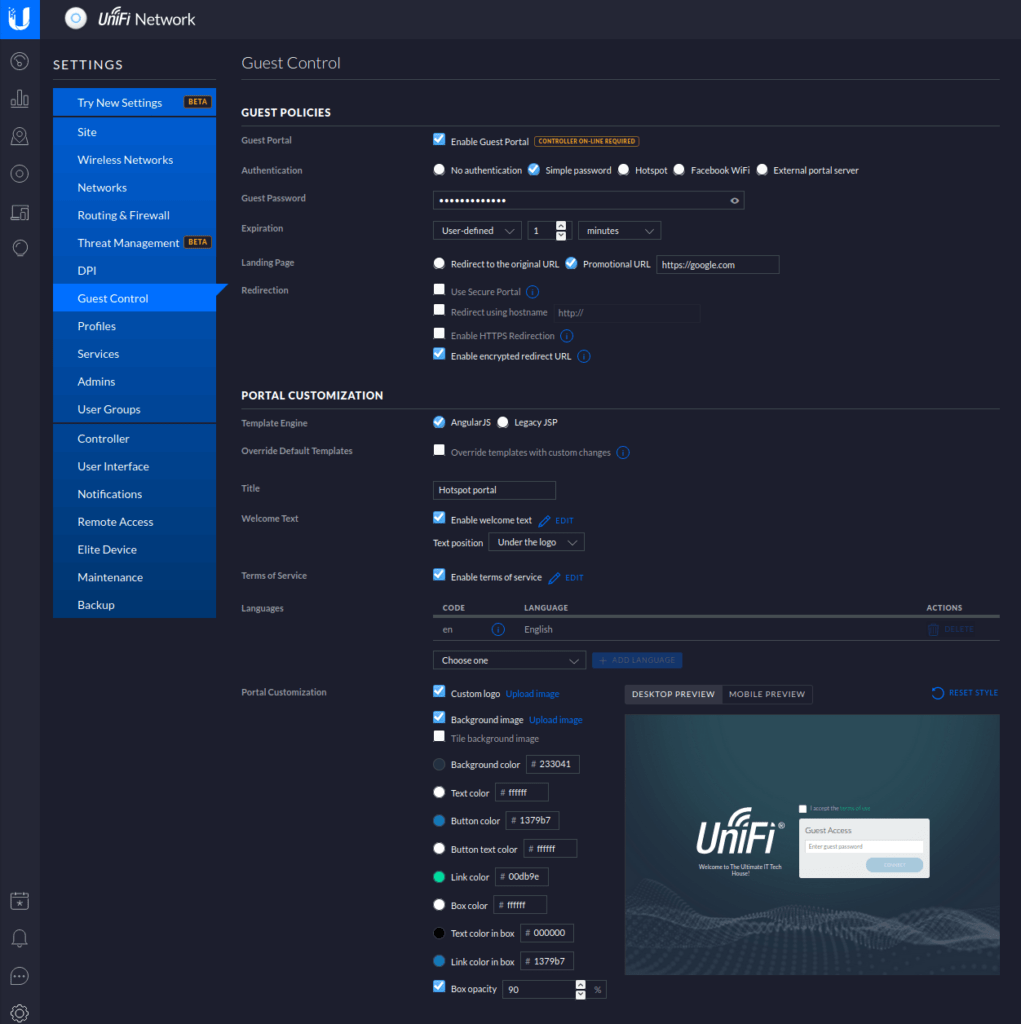
Now you have to set up the portal, do this by going to Guest Control. This page allows you to customize the login portal to suit your needs. There are two major requirements for the portal to be able to work. You have to enable the portal before you save it, and your Cloud Key must always be accessible. So, if you are running your Cloud Key on a laptop in the background, that laptop must always be turned on. Otherwise, the access point is not able to redirect new users to the portal.
2 Responses
I appreciate the originality and creativity in your blog posts.
Your writing style is captivating; I couldn’t interrupt reading once I began.