How Can We Help?
Reinstall QNAP TS-419U+
Did you recently acquire a QNAP TS-419U+? Or do you want to have a fresh start with it? This article will explain how to reinstall the NAS.
Prerequisites
This reset will be performed from the QNAP portal. If you lost access to the portal reset it by holding the reset button (with a paperclip) for 3 seconds until you hear a beep. The login will now be changed to admin and the MAC address of the first ethernet port.
This article is for a QNAP TS-419U+ NAS, the steps might differ in case you have a different NAS.
The NAS needs to have an internet connection since we will be working from the portal.
For future notice, you can find the release page of QTS (the portal software from QNAP) at qnap.com.
Reinstallation
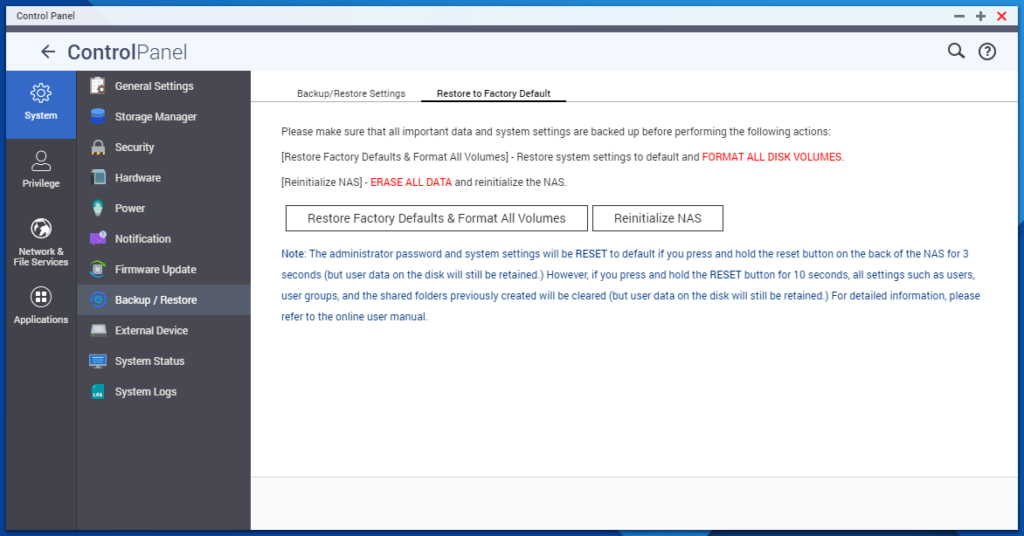
To start the reinstallation process, log in to your NAS and open the Control Panel. Navigate to Backup / Restore and click the Restore to Factory Default tab. Now decide between restoring settings to default and erasing all data OR erasing all data and reinitializing the NAS. In this article, we cover Reinitialize NAS.
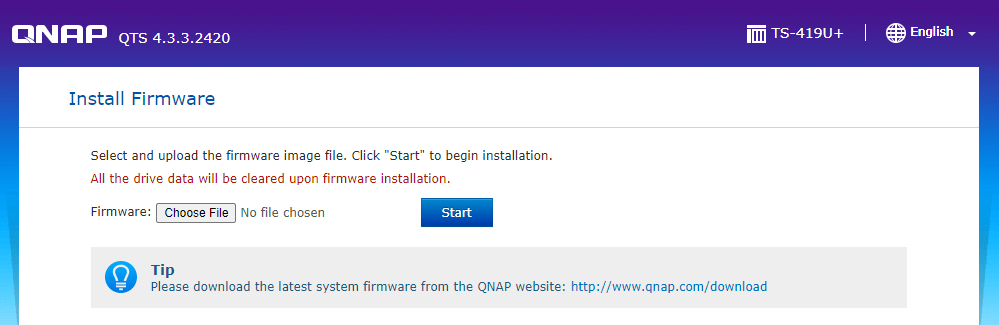
Once the NAS is rebooted, visit the IP address of the NAS, this should start the installation wizard. Firstly, it will request you to upload the firmware, you can download the latest version for the TS-419U+ at qnap.com (if you have a different version make sure to select the proper model from the list). Once uploaded click Start.
Make sure to NOT power off the NAS during the process. Once the installation is finished a welcome message appears to start the Smart Installation Guide.

Give the NAS a name, add your preferred password, and click Next.
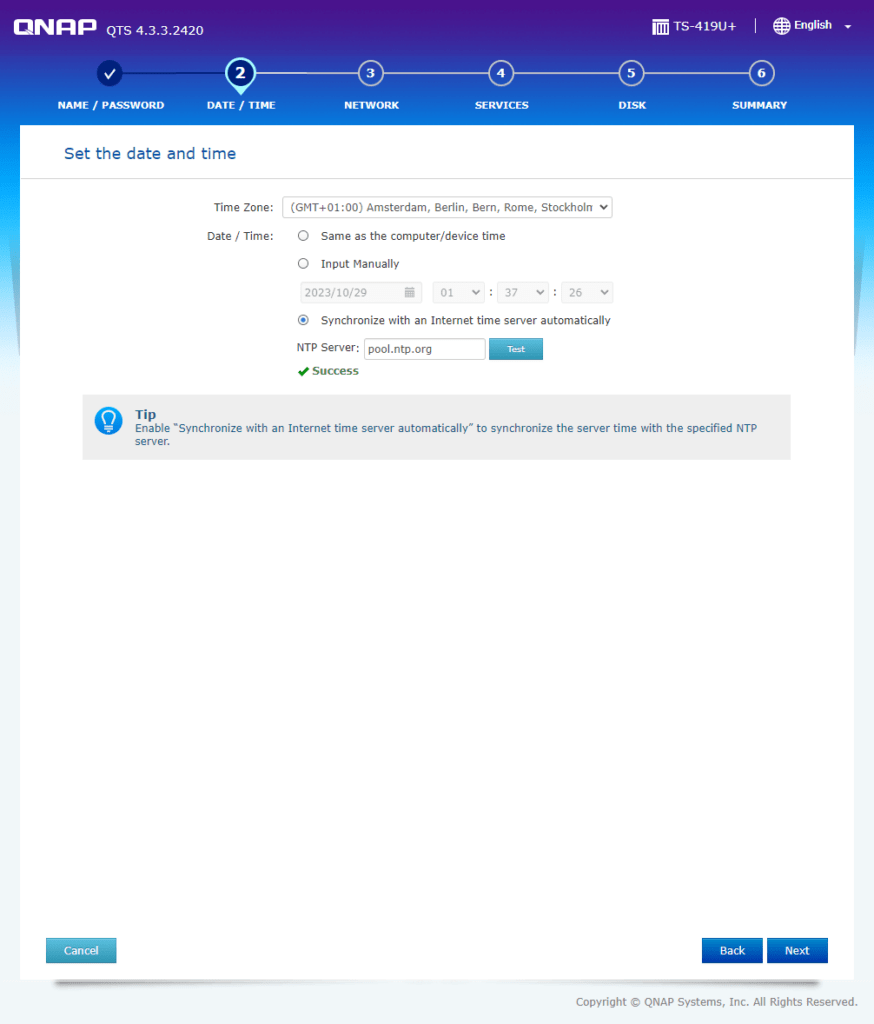
Select your Time Zone, Date / Time, and click Next.
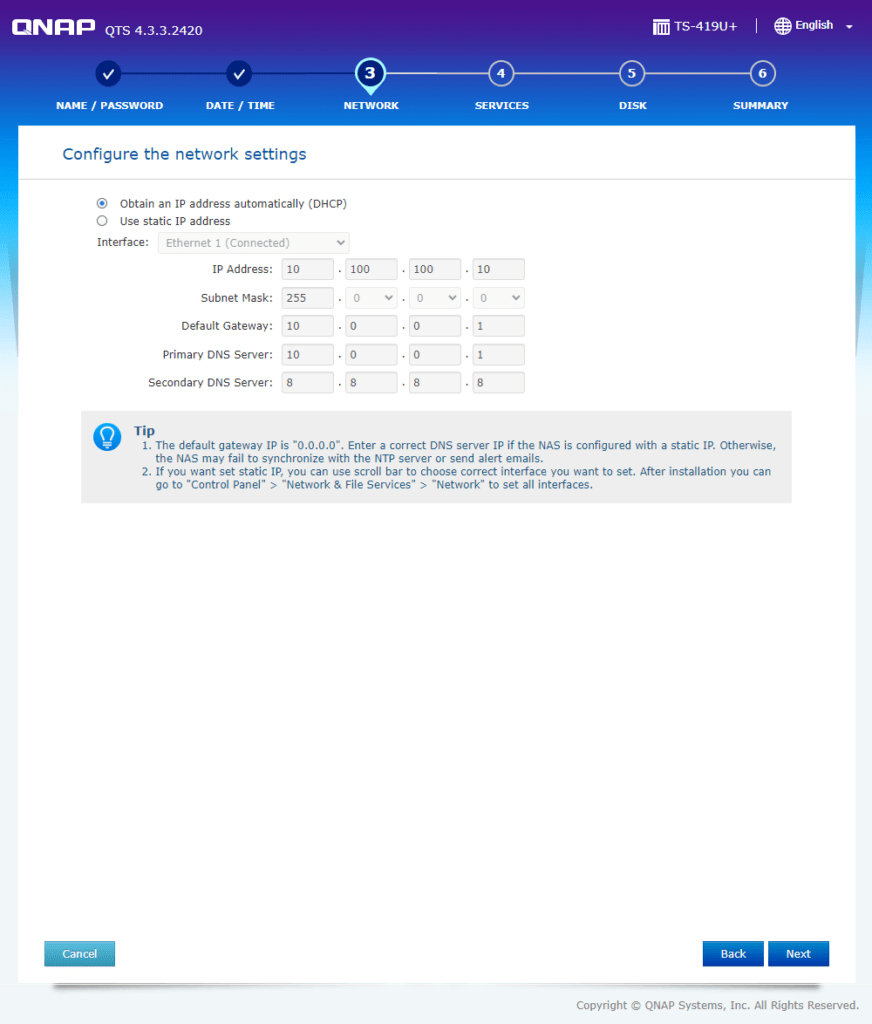
Now choose between a static or automagic IP address.
Select for what platforms you are going to use the NAS, this defines what services will be enabled. Even though I will use it for Windows, Mac, and Linux, I opted to only select the Windows services. Since these services can also be used on Mac and Linux.
Now it is time to select the RAID configuration. Make sure to select the disks you want for your RAID and select a RAID type. Optionally, you can enable a Hot Spare Drive, encrypt it, and scan for bad blocks. I opted to scan for bad blocks after my installation to speed up the process. Once satisfied click Next.

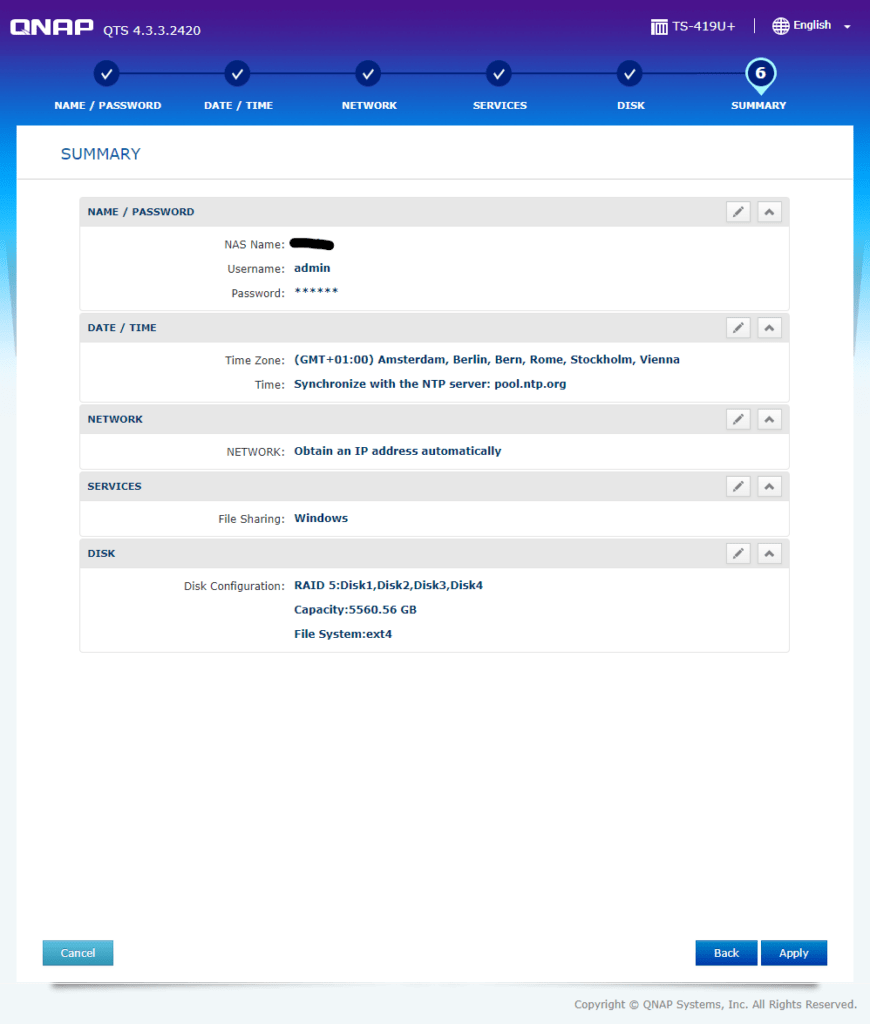
You will now be presented with the summary of your installation, if you are satisfied click Apply.
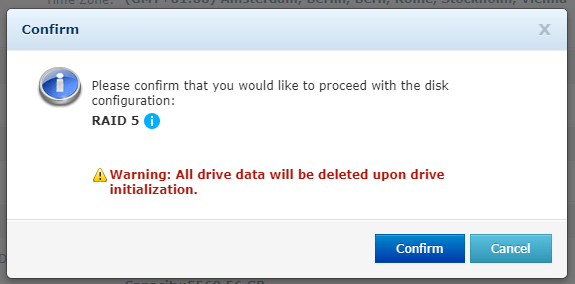
A prompt will open to warn you about data deletion, click Confirm.
After the NAS is done with the installation it will reboot, and after you login the NAS is ready for use.
4 Responses
Valuable insights backed by true examples; it can’t get better than that.
Your blog consistently captures my attention throughout. I cannot stop reading before consuming every word you write.
Your passion is contagious, igniting excitement and curiosity about the topics you cover.
We love the style the author write. Your post is easy to follow and understand. Thank you for sharing your thoughts.