How Can We Help?
PrestaShop Installation
Are you dreaming of your own web shop? Do you want to try PrestaShop and start your new shopping imperium? This article will explain how to install PrestaShop.
Prerequisites
According to the System requirements for PrestaShop 8 (devdocs.prestashop-project.org), PrestaShop requires the following resources quite minimal resources, therefore we gave it the following:
- 2 CPUs
- 1GB of Memory
- 8GB of Storage
For future notice, the PrestaShop changelog can be found at github.com.
To validate the requirements have a look at the validation chapter down below.
Installation
MariaDB
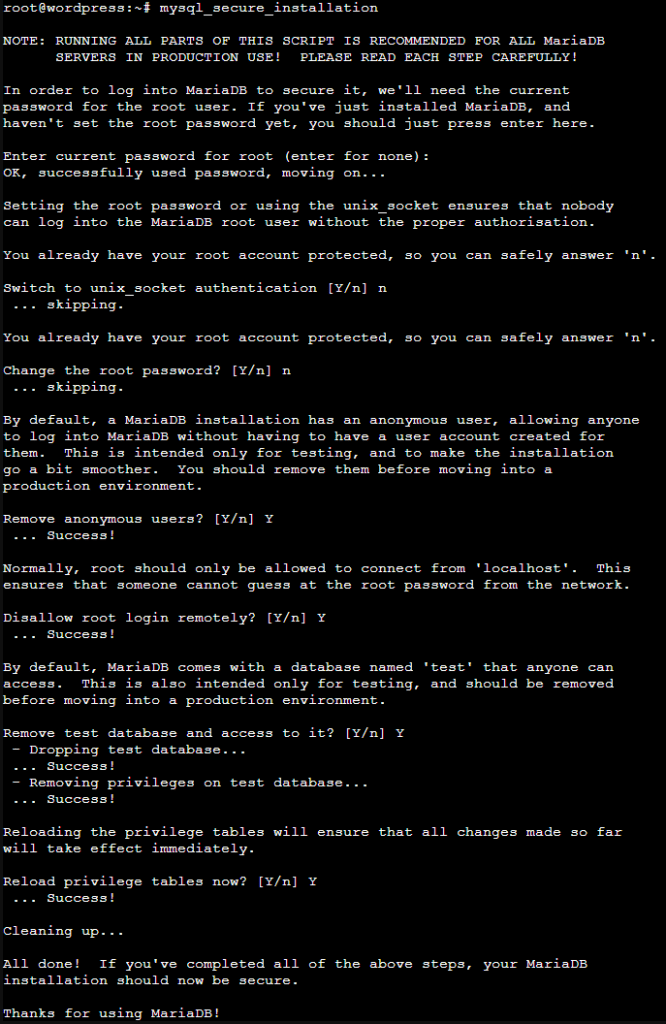
PrestaShop requires a database to save its data. To install MariaDB run apt-get install mariadb-server. After the installation is finished secure the database by running mysql_secure_installation. This will prompt the following questions:
- Enter current password for root: Fill in your root password
- Switch to unix_socket authentication: Press
nsince we already have a root user - Change root password: Press
Yand fill in a new password or your root password - Remove anonymous users: Press
Ysince we will add specific users later - Disallow root login remotely: Press
Ysince logging in locally is more secure - Remove test database and access to it: Press
Ysince we will add a specific database later - Reload privilege tables now: Press
Yto update the database
Now open a connection to the database using mysql -u root -p and enter the following:
CREATE DATABASE prestashop_db;
CREATE USER 'prestashop_user'@'localhost' identified by '****';
GRANT ALL PRIVILEGES ON prestashop_db.* TO 'prestashop_user'@'localhost';
FLUSH PRIVILEGES;
QUIT;
This will set up a database with a user which will be used later for PrestaShop. Make sure to modify the variables to your needs, and write the details down for the next steps.
Alternatively, you can add the above-mentioned SQL statements to a file and let the database apply it using the following command:
cat ~/prestashop-database.sql | mysql --defaults-extra-file=/etc/mysql/debian.cnfApache
To be able to visit the PrestaShop website, you need a web server. We will use Apache, to install it and run apt-get install apache2.
PrestaShop requires the rewrite and the headers module, to enable them run a2enmod __MODULE__ and restart Apache using systemctl restart apache2.
PHP
PrestaShop requires PHP to run, below is a table showing the recommended PHP (8.2) packages for PrestaShop.
| Name | Package | Importance | Motivation |
|---|---|---|---|
| CURL | php8.2-curl | Required | Used to download remote resources like modules and localization packages |
| DOM | Enabled by default | Required | Needed to parse XML documents |
| Fileinfo | Enabled by default | Required | Used to find out the file type of uploaded files |
| GD | php8.2-gd | Required | Used to create thumbnails for the images that you upload |
| Iconv | Enabled by default | Required | Used to convert character sets |
| Intl | php8.2-intl | Required | Used to display localized data |
| JSON | Enabled by default | Required | Used to manage JSON format |
| Mbstring | php8.2-mbstring | Required | To perform string operations everywhere |
| OpenSSL | openssl | Required | Used to improve security |
| MySQL | php8.2-mysql | Required | Used to connect to MySQL databases |
| SimpleXML | php8.2-xml | Required | Used to manage XML files |
| Zip | php8.2-zip | Required | Used to expand compressed files |
| BCMath | php8.2-bcmath | Optional | |
| ImageMagick | php8.2-imagick | Optional | |
| Memcached | php8.2-memcached | Optional |
To install the packages select your preferred packages and run apt-get install <packages separated by spaces>.
To verify which PHP modules are enabled use php -v. If there are modules that are not enabled yet, you can run phpenmod __MODULE__.
Restart the webserver to make sure that it uses the newly enabled modules: systemctl restart apache2.
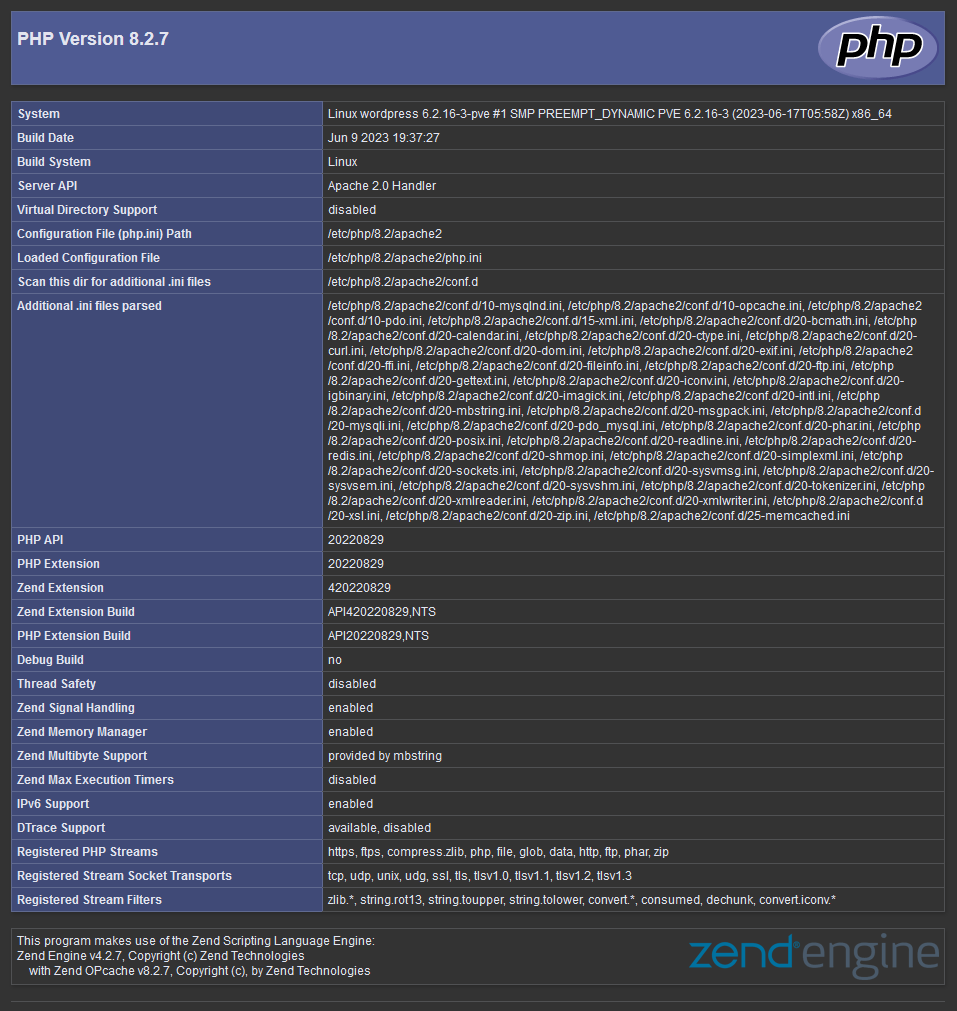
Since we have installed an Apache web server we also require a PHP package to communicate with Apache, install it using apt-get install libapache2-mod-php8.2. To validate if PHP works, create a file named /var/www/html/php_info.php and add the following:
<?php
phpinfo();
?>
If you navigate to __YOUR_URL__/php_info.php you should see an information page about the PHP installation.
Additionally, PrestaShop requires some PHP settings, therefore, open /etc/php/8.2/apache2/conf.d/prestashop.ini and add the following:
extension = php_mysql.dll
extension = php_gd2.dll
allow_url_fopen = On
allow_url_include = Off

max_input_vars = 1024
memory_limit = 256M
post_max_size = 16M
upload_max_filesize = 4M
Now restart Apache using systemctl restart apache2 to enable the changes.
PrestaShop
Download the latest version from prestashop.com using wget.
To install PrestaShop from the source, use the following commands:
# Navigate to the Apache web server file location
cd /var/www/html
# Download PrestaShop
wget https://download.prestashop.com/download/releases/prestashop_8.1.1.zip
# Extract the files
unzip prestashop_8.1.1.zip
# Set the correct ownership for the web server
chown -R www-data:www-data /var/www/html
# Optional: Cleanup
rm -rf index.html php_info.php prestashop_8.1.1.zip
Optionally, if you want to install a custom PrestaShop version go to the version page (prestashop.com), copy the link of your preferred version and download and extract it on your server.
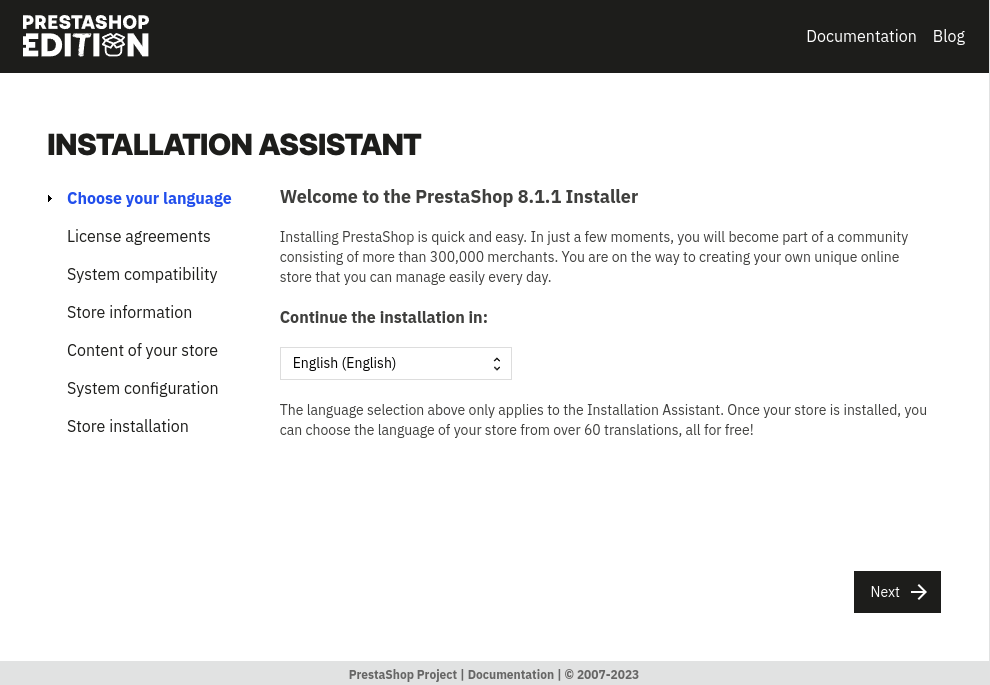
Navigate to __PRESTASHOP_URL__. Choose your preferred language and click Next.
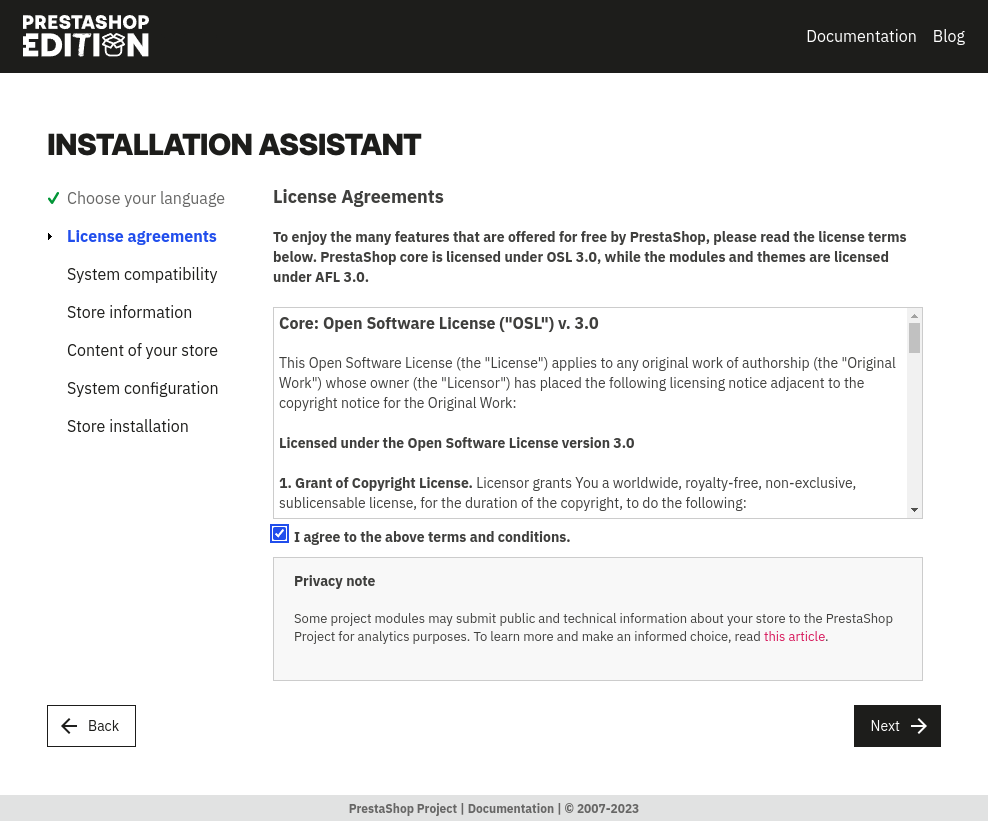
Accept the License Agreements and click Next.
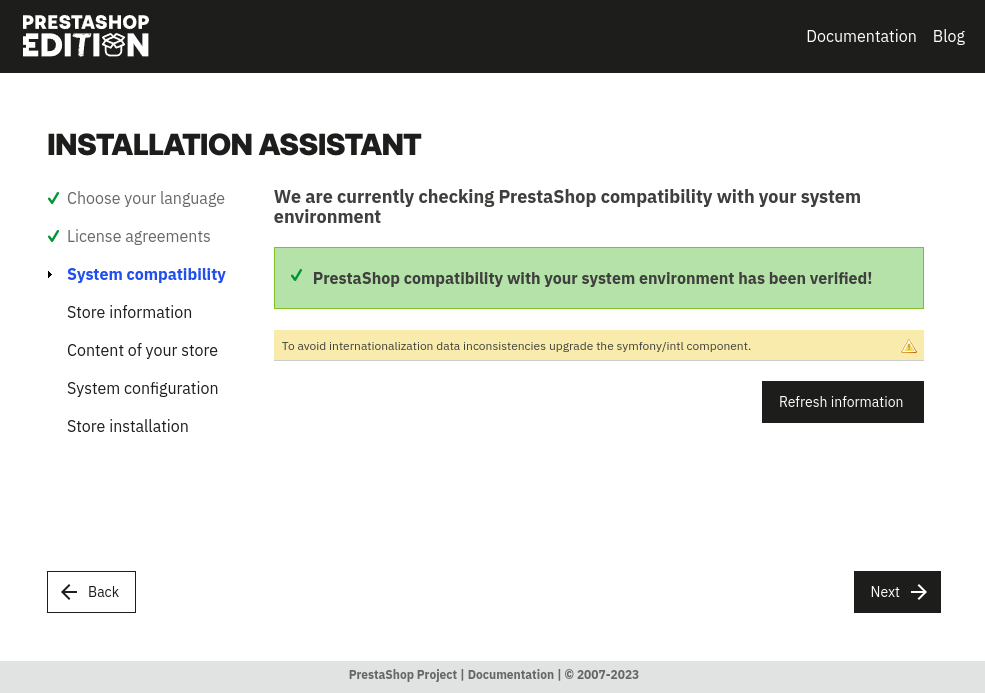
Validate the System compatibility and click Next.
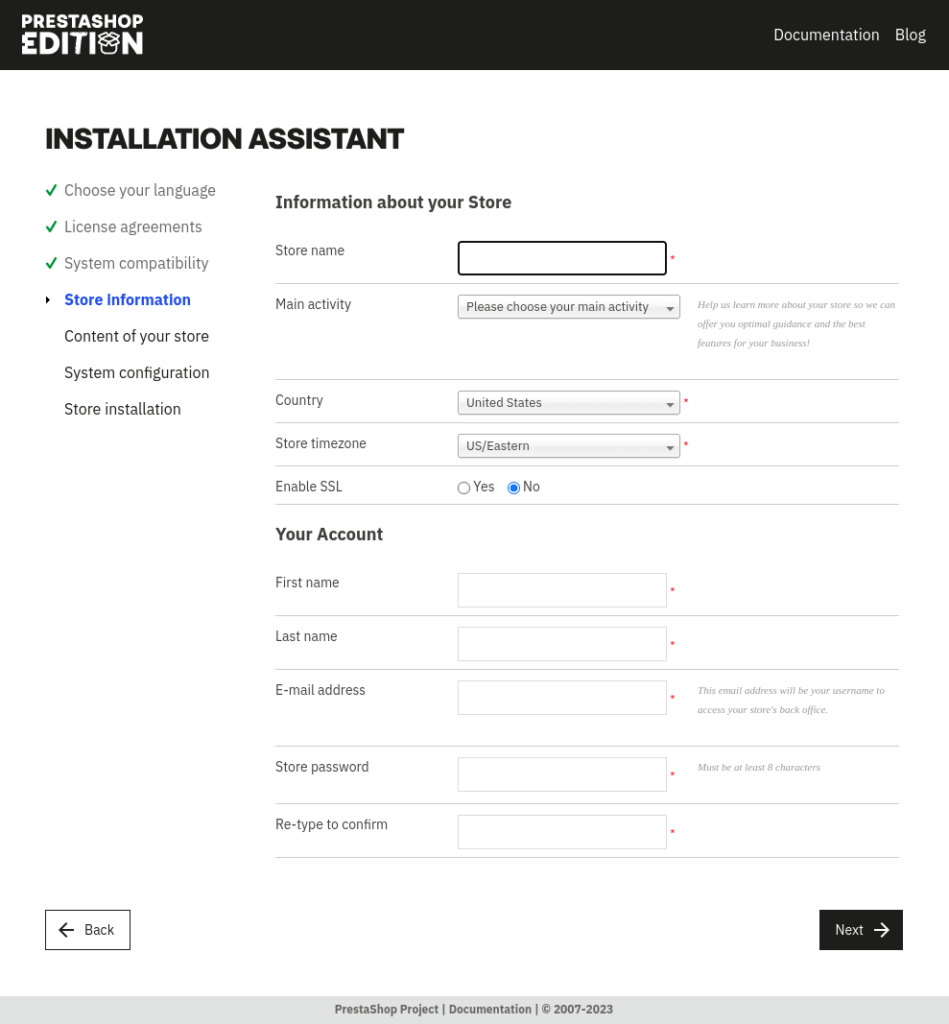
Fill out the shop details and add account details. Once satisfied click Next.
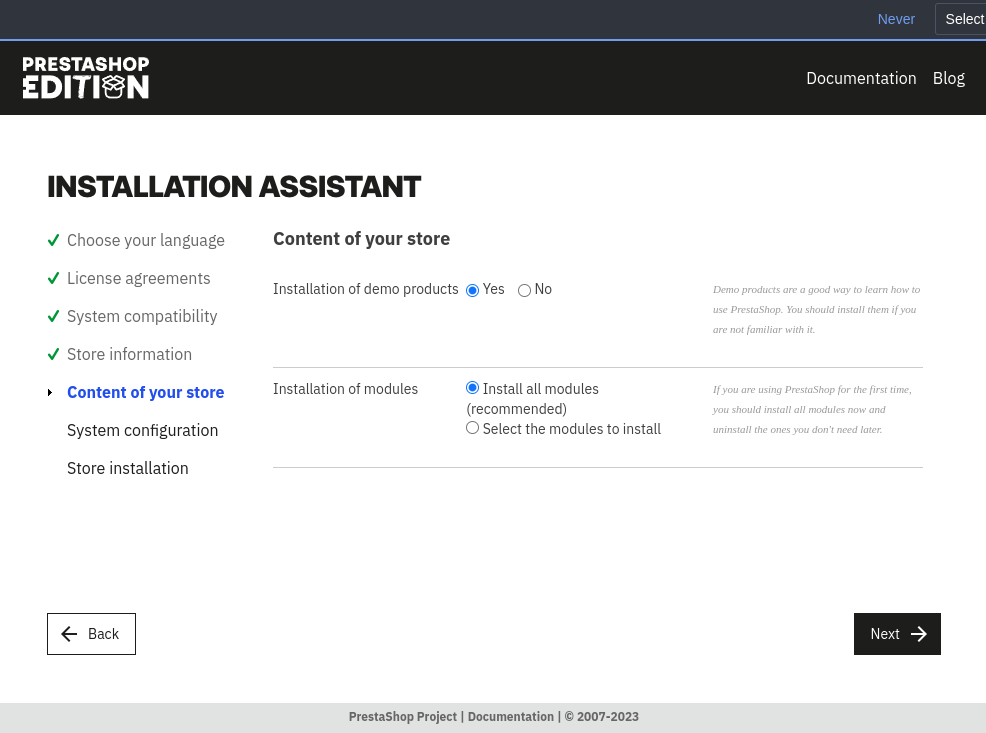
Select whether or not you want demo data and select the installation modules. Click Next when satisfied.
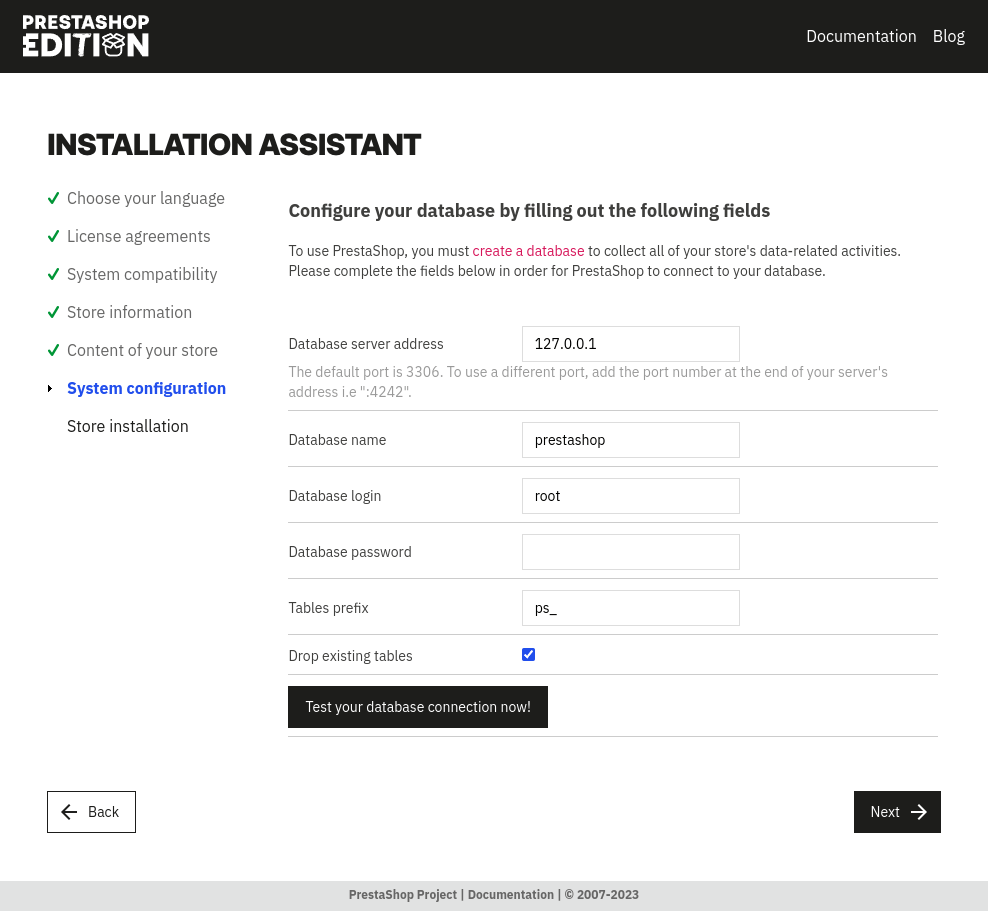
Fill in your database configuration, test it, and once it works click Next.
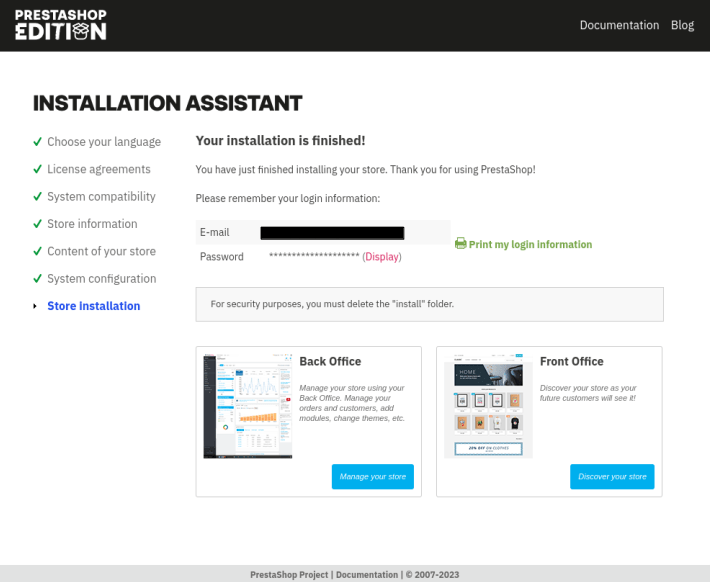
PrestaShop will no install your webshop, and will show you once its finished. It will have a link to two URLs, the first one is the frontend, which represents your store, and the second one is the backend to manage the store. The backend becomes available once you delete the install folder from your webserver.
Validation
To validate if the server meets the requirements of PrestaShop, download the phppsinfo.php from this GitHub repository (github.com) and place it in your PrestaShop installation folder.
Now navigate to __PRESTASHOP_URL__/phppsinfo.php and login with prestashop as username and password. Here you will be presented with an overview of the server requirements and whether your server is up to specification.
3 Responses
I highly recommend ernestopro.com for anyone seeking a reliable solution to PrestaShop installation issues. Their detailed guides and expert support make the process straightforward, reducing setup time and ensuring stability. I’ve used their services and found them to be incredibly helpful and easy to understand. For seamless PrestaShop setup, ernestopro.com is definitely the way to go.
Your platform holds my attention from beginning to end. I find myself engrossed into every word you write.
This is an invaluable resource for anyone interested in this topic.