How Can We Help?
VLANs in pfSense
Virtual LAN or VLAN is a way of splitting your network into several LAN groups. These groups can have full, partial, or no access to each other. This comes in handy if you want to separate your users from your servers for example.
Add VLAN
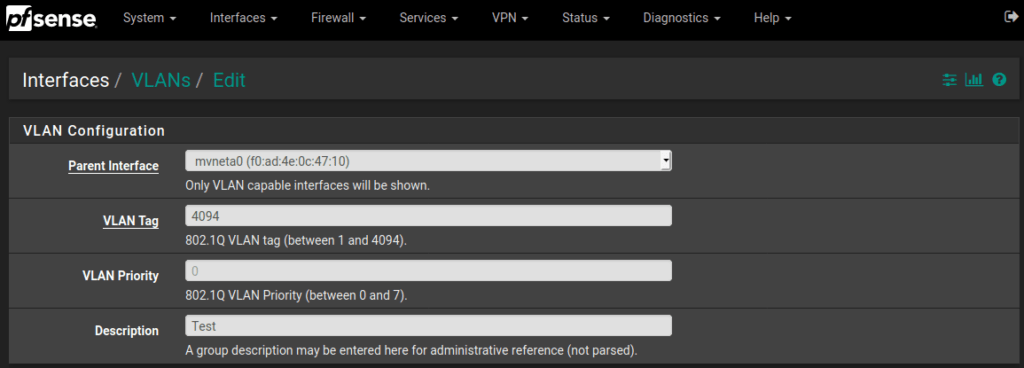
Add a new VLAN by logging in to your pfSense and going to Interfaces – Assignments – VLANs. Give it a VLAN tag and an appropriate description.
In order for this VLAN to work, it needs an interface. Add it by going to Interfaces – Assignments, and selecting it from the Available network ports list. Click on the added interface in the list and enable it. Change the description to a more appropriate one. Set the IPv4 Configuration Type to static and fill in the desired subnet.
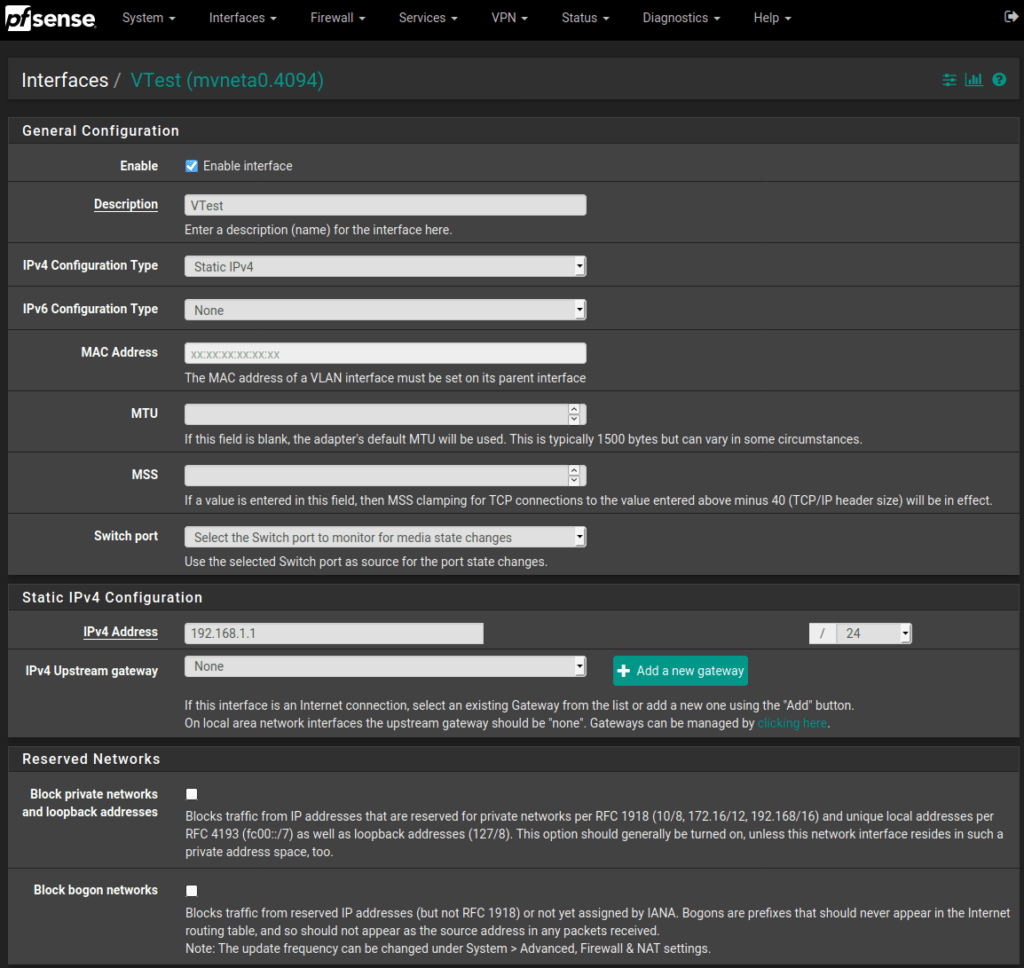
In order for the changes to take effect, you have to apply them.

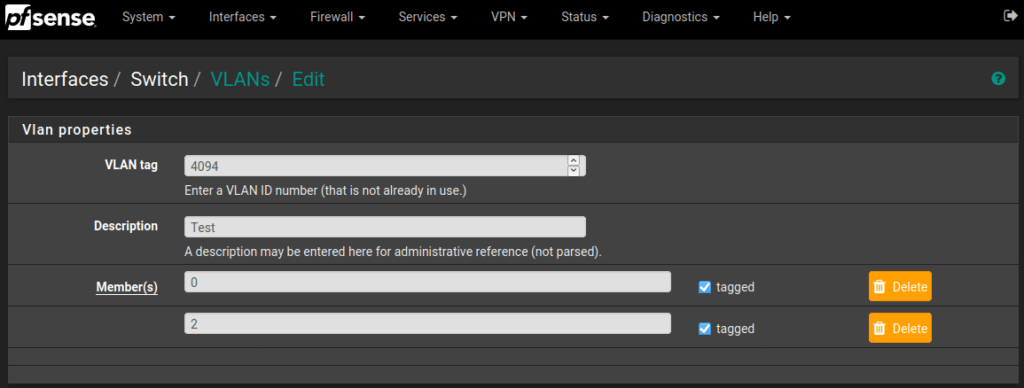
Now the VLAN has been created, it needs to be attached to a port on the pfSense server. To do this navigate to Interfaces – Switches – VLANs, and add a new tag. Fill in your chosen VLAN ID as the VLAN tag, and give it an appropriate description.
The members for the VLAN tag is depending on your VLAN table and on which port your VLAN must be available. Therefore, let’s take a closer look at the default VLAN table. As shown below VLAN group 0 is the system VLAN. VLAN groups 1, 2, and 3 correspond with the WAN, LAN, and OPT port of the pfSense server.

So if we want your VLAN to be available at our LAN port, you have to tag both VLAN groups 0 and 2.
Allow internet
By default, the VLAN is created without firewall rules. This means that the VLAN is not able to go to the internet. To fix this you have to add firewall rules to the VLAN. This can be done by configuring them manually or by copying them from the LAN rules.
This tutorial shows how it can be done by copying them from the existing LAN rules. To view the current LAN rules, go to Firewall – Rules – LAN.

The default rules show three rules. The first rule is an anti-lockout rule. This is a setting within pfSense that makes sure that every device connected to LAN is able to access the pfSense webpage. You can change this by going to System – Advanced, and disabling Anti-lockout. The other two rules are to make sure that the internet can be accessed via either IPv4 or IPv6.
Copy the IPv4 and IPv6 rules and change the following to your situation:
- Interface: LAN > VTEST
- Source: LAN net > VTEST net
- Description: Default allow LAN to any rule > Default allow VTEST to any rule
Finally, apply these changes.

Optional: Configure DHCP server
A DHCP server ensures that connected devices get an appropriate IP. If you want to use the built-in DHCP server from pfSense for your VLAN, go to Services – DHCP Server – VTEST. Enable the DHCP server for your VLAN and optionally give it an IP range.
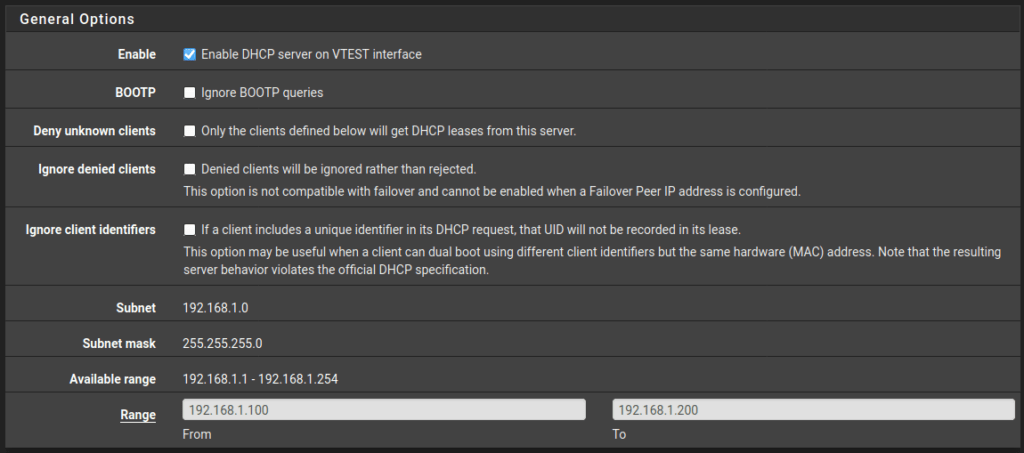
In case you decided to add an IP range, it is possible that you want to add static IP addresses outside this range. This can be done by scrolling down and adding them to the DHCP Static Mappings for this Interface.

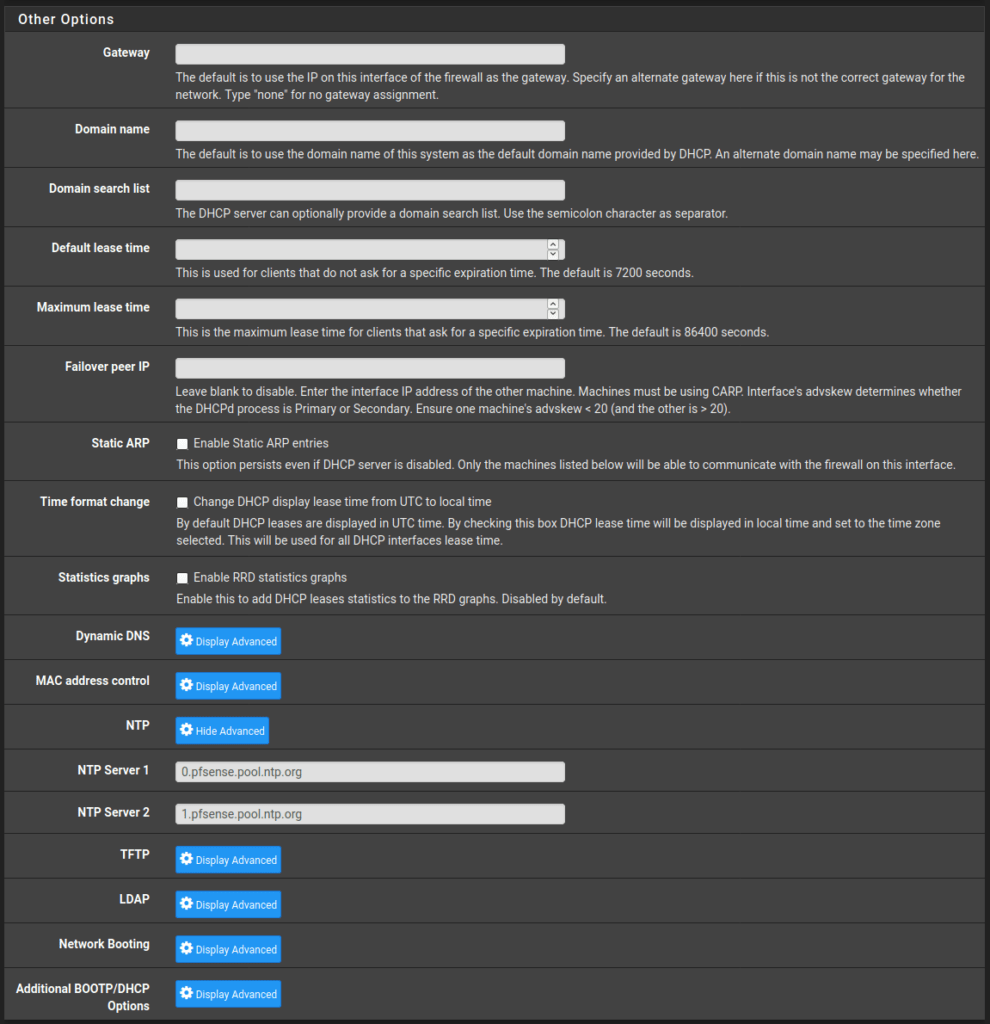
If you configured the pfSense server to serve an NTP server, then you are able to edit the settings under Other Options – NTP. Click on Display Advanced and fill in the proper IP.
Save your DHCP configuration if you are satisfied with your settings.
Next steps
If you have a dedicated switch connected to your pfSense server, you must not forget to configure the VLAN(s) on the switch too. Take note that this is only possible for managed switches.
In order to properly configure your switch, configure the pfSense incoming port as a trunk port or configure it that it allows ALL VLANs. Depending on the switch you have to duplicate the VLAN IDs and tag the correct ports with the correct VLANs.
2 Responses
Your blog has rapidly become my go-to source for motivation. Thank you for sharing your thoughts.
Your writing style is so captivating; it’s like reading a conversation with a friend.